Techniques for Drawing Travel Stamps in Python
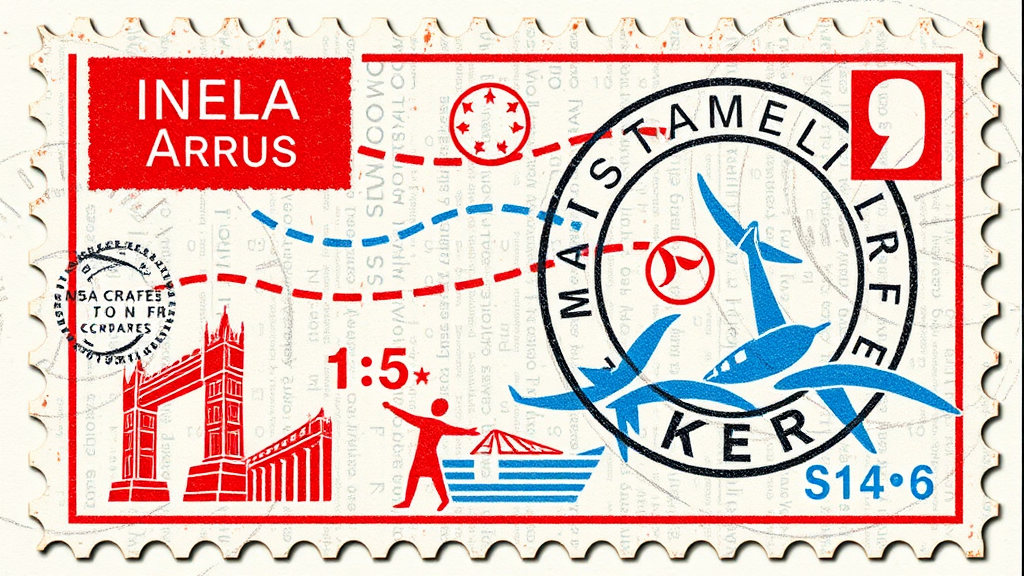
Creating travel stamps on Python can be a fun and engaging project for beginners and experienced programmers alike. With its powerful libraries and frameworks, Python offers numerous ways to create artistic designs, including mimicking the classic look of travel stamps. Below are some effective techniques for drawing travel stamps using Python.
Utilizing Turtle Graphics
Turtle graphics is a great way to introduce you to the concepts of drawing in Python. It provides an interactive environment where you can create shapes and designs step by step. Here’s how you can get started:
- Install Python and Turtle: Make sure you have Python installed. The Turtle module comes pre-installed with Python, so you’re good to go!
- Create a basic design: Begin with a simple function that initializes the turtle.
import turtle

def draw_circle(color, x, y):
    turtle.penup()
    turtle.goto(x, y)
    turtle.pendown()
    turtle.fillcolor(color)
    turtle.begin_fill()
    turtle.circle(50)  # Radius of 50
    turtle.end_fill()
In this example, the draw_circle function sets up the environment to draw circles representing the stamp outline. You can call this function with different colors and coordinates to create designs.
Matplotlib for Advanced Graphics
For more advanced designs, you might want to use the Matplotlib library. This library can help you create more complex designs with customizable features.
- Install Matplotlib: If you don’t already have it, you can install Matplotlib using
pip install matplotlib. - Create a stamp design: Utilize the plotting features to create your stamp graphic.
import matplotlib.pyplot as plt

# Create a function to draw a travel stamp
def draw_stamp():
    fig, ax = plt.subplots()
    circle = plt.Circle((0.5, 0.5), 0.4, color='blue', fill=True)
    ax.add_artist(circle)

    # Add text in the center
    plt.text(0.5, 0.5, 'Travel', fontsize=20, ha='center', va='center', color='white')

    plt.xlim(0, 1)
    plt.ylim(0, 1)
    ax.set_aspect('equal', adjustable='box')
    plt.axis('off')  # Hide axes
    plt.show()

draw_stamp()
This code creates a simple circular stamp with the word “Travel” inside. You can modify the colors, fonts, and sizes according to your needs.
Using Pygame for Interactive Stamps
If you are interested in creating dynamic or interactive travel stamps, Pygame is the ideal tool. It’s suitable for building games or interactive applications. Here’s how to get started:
- Install Pygame: You can install it via
pip install pygame. - Create a window and draw: Initiate a Pygame window to draw the stamp.
import pygame

def draw_pygame_stamp():
    pygame.init()
    screen = pygame.display.set_mode((400, 400))
    running = True
    screen.fill((255, 255, 255))  # White Background

    while running:
        for event in pygame.event.get():
            if event.type == pygame.QUIT:
                running = False

    pygame.draw.circle(screen, (0, 128, 255), (200, 200), 100)  # Draw Circle
    font = pygame.font.SysFont(None, 55)
    text = font.render('Stamp', True, (255, 255, 255))
    screen.blit(text, (150, 175))  # Position text in the circle

    pygame.display.flip()

draw_pygame_stamp()
pygame.quit()
Adding Custom Artwork and Text
Whether you are using Turtle, Matplotlib, or Pygame, custom artwork can elevate your travel stamps. You can:
- Draw unique icons representing landmarks, like the Eiffel Tower or the Statue of Liberty.
- Use fonts that match the theme of your travel stamp.
- Incorporate elements such as borders or patterns to mimic real travel stamps.
For artwork inspiration, consider checking Freepik for free graphics or Vecteezy for vector images.
With these techniques and tools at your disposal, creating travel stamps in Python is exciting and rewarding. Whether you want to showcase your coding skills or create a memorable project, drawing travel stamps can be a great way to experiment with creativity and technology.
Exploring Creative Design Ideas for Custom Stamps
Custom stamps can add a personal touch to your projects. Whether you’re crafting invitations, creating scrapbooks, or simply personalizing your stationery, there are countless design ideas to explore. Here are some creative concepts to inspire your custom stamp designs.
1. Incorporate Personal Symbols
Using symbols that resonate with you can make your stamps more meaningful. Consider the following:
- Monograms: Create a stamp featuring your initials.
- Favorite Icons: Design stamps that represent hobbies or interests, such as music notes, flowers, or travel-related images.
- Astrological Signs: Include your zodiac symbol or others that are significant to you.
2. Utilize Textures and Patterns
Textures and patterns can elevate your stamp designs. Here’s how to incorporate them:
- Geometric Shapes: Create modern stamps using triangles, circles, or hexagons.
- Nature Patterns: Incorporate leaves, waves, or clouds to add a natural feel to your stamps.
- Fabric or Wood Grain: Use patterns that mimic textiles or nature’s textures for a unique aesthetic.
3. Combine Elements
Mixing various elements can lead to more dynamic designs. Consider combining:
- Images with Text: Pair illustrations with quotes or your name.
- Contrast: Use bold lines with soft elements for visual interest.
- Color Play: Experiment with colorful ink to add vibrancy to your stamps.
4. Seasonal Themes
Design stamps that reflect the seasons or holidays. Here are some ideas:
- Winter: Snowflakes, Christmas trees, or holiday greetings.
- Spring: Flowers blooming, Easter eggs, or pastel colors.
- Summer: Beach themes such as seashells, sun, and sunglasses.
- Autumn: Leaves changing colors, pumpkins, or harvest motifs.
5. Handmade vs. Digital
Your design approach can also influence creativity. Here’s a quick comparison:
| Aspect | Handmade Stamps | Digital Stamps |
|---|---|---|
| Tools Required | Carving tools, rubber or foam | Graphic software |
| Process | Physical creation, unique imperfections | Digital rendering, perfect precision |
| End Use | Inking by hand, personal touch | Printing or online use, versatility |
6. Use DIY Techniques
When creating stamps, don’t hesitate to explore DIY techniques that can enhance your designs:
- Potato Stamps: Cut shapes into a potato, dip, and stamp for a fun effect.
- Foam Shapes: Use craft foam on a block for quick designs.
- Silicone Molds: Design intricate shapes that can be filled with ink.
7. Learn from the Experts
Explore websites dedicated to custom stamps for more inspiration:
- Stampin’ Up!: Offers a range of customizable stamps.
- Amazing Stamp Co.: Tips and ideas for custom designs.
- Zazzle: Tools for creating your own unique stamps.
Custom stamps are not only practical but also a fun creative outlet. Whether you choose to go with personalized symbols, seasonal themes, or intricate patterns, the options are limitless. Let your imagination run wild and see where your custom stamp designs take you!
Utilizing Python Graphics Libraries for Travel Illustrations
Python offers a variety of graphics libraries that can breathe life into your travel illustrations, allowing you to showcase destinations in a visually appealing manner. Whether you are a seasoned traveler looking to document your experiences or a beginner wanting to create illustrative maps, understanding the right tools is essential. This article will delve into the various Python graphics libraries that can help you create stunning travel illustrations.
Popular Python Graphics Libraries
Different libraries serve varying purposes, each with its unique features and capabilities. Here are some of the top options:
- Matplotlib: A versatile 2D plotting library that provides a simple way to create static, animated, and interactive visualizations in Python. Ideal for representing travel data through plots and graphs.
- Pillow: A powerful Python Imaging Library (PIL) that allows you to create, manipulate, and save images in different formats. Great for editing travel photos and creating custom illustrations.
- Turtle Graphics: A fun and beginner-friendly library aimed at introducing programming concepts. Perfect for making simple illustrations of travel scenes, such as landmarks or vehicles.
- Seaborn: A statistical data visualization library built on top of Matplotlib. It offers advanced features for attractive and informative statistical graphics, making it suitable for visualizing travel statistics.
Getting Started with Matplotlib for Travel Illustrations
Using Matplotlib is a fantastic way to represent travel data visually. Here’s a step-by-step guide to creating simple travel illustrations:
- Installation: First, make sure you have Matplotlib installed. You can install it using pip:
pip install matplotlib- Import Libraries: You will need to import Matplotlib and NumPy for creating visualizations:
import matplotlib.pyplot as plt
import numpy as np- Create Travel Data: Define your travel data. You can use lists or NumPy arrays to represent your data:
destinations = ['Paris', 'New York', 'Tokyo', 'Sydney']
visitors = [150, 200, 180, 175]- Plot the Data: Use the bar chart function to visualize your travel data:
plt.bar(destinations, visitors)
plt.title('Travel Visitors by Destination')
plt.xlabel('Destinations')
plt.ylabel('Number of Visitors')
plt.show()
This basic example showcases how you can visually represent travel information. Modifying colors, labels, and titles can further customize your illustrations.
Utilizing Pillow for Travel Photo Manipulation
Pillow helps you enhance travel photos or create new illustrations from scratch. Follow these steps for basic image manipulation:
- Installation: Install Pillow using pip:
pip install Pillow- Import Pillow: Import the Image module from Pillow:
from PIL import Image- Open an Image: Load your travel photo:
image = Image.open('travel_photo.jpg')- Resize and Save: Adjust the size and save a new image:
image = image.resize((800, 600))
image.save('edited_travel_photo.jpg')
This can help in creating engaging travel content for social media or blogs.
Creating Simple Illustrations with Turtle Graphics
If you want to create simple graphics, Turtle Graphics is your go-to option. Follow these quick steps:
- Installation: Turtle comes pre-installed with Python, so you don’t need to install anything. Just import it:
import turtle- Set Up the Canvas: Define a function to set up your drawing canvas:
def setup_canvas():
    turtle.bgcolor("skyblue")
turtle.title("Travel Scene")- Draw a Simple Scene: Use Turtle methods to draw elements like trees or buildings:
setup_canvas()
turtle.penup()
turtle.goto(-100, -150)
turtle.pendown()
turtle.forward(100)  # Drawing a tree
# Add more shapes to complete your scene
turtle.done()
This technique allows you to visualize travel themes in a playful way. To explore more Turtle Graphics, check out the official Python Turtle documentation.
By utilizing these graphics libraries, you can create a diverse range of travel illustrations that not only enhance your storytelling but also engage your audience visually. Each library has its strengths, empowering you to express your travel experiences creatively.


Leave a Reply